Mackay

As I’ve spent last 3 months in Mackay, QLD I decided to share some pictures from favorite places around. My number 1 fav spot is Finch Hatton Gorge in Eungella NP. And I continue to explore local beaches – never thought Mackay has so many! Have to say, I’ve been pleasantly surprised. Hope you enjoy 🙂

Eungella NP, a track to Finch Hatton GorgeIMG_0585

road to Finch Hatton, Pioneer ValleyIMG_0590

Finch Hatton GorgeIMG_0598

Illawong Beach, MackayE5930703-BF1E-41DB-921E-FE0E859A3C29

Finch Hatton GorgeIMG_0397IMG_0582IMG_0610

40 Footer swimming hole, KuttabulIMG_0819IMG_1021IMG_1026IMG_1037

Bakers Creek, MackayIMG_1154Slade PointIMG_1243

Diesel loving beach life 🙂IMG_1514

McEwen’s BeachIMG_1596IMG_1599IMG_1611IMG_1613

McEwen’s BeachIMG_1655

Agnes Water

Here are some pics from one of my fav little towns in Queensland – Agnes Water/1770.
The Town of 1770 was built on the site of the second landing in Australia by captain James Cook and the crew of HM Bark Endeavour in May 1770.

First time time I came here was October 2019 and I’ve been back 5 times haha
This little coastal town has everything you need; from great tavern with live music on Saturdays, lovely cafes and friendly locals, boutique shops and great surf schools – it’s a must see if you’re traveling Australia’s East coast. It’s a pretty vibrant town with 4 backpacker hostels so there are always friends to be made!

I just can’t stop coming back here and once you decide to come here I think you’ll understand why 🙂

fullsizeoutput_468OFMSE7997fullsizeoutput_46cfullsizeoutput_46dfullsizeoutput_46eIMG_9968IMG_9958IMG_9896 2IMG_0110

How to find farmwork & complete 88 days

G’day everyone! I’m currently on ‘holidays’ back home in Poland and as you can imagine I have a lot of free time 😉 Recently, I’ve been reading a lot of backpacker forums on FB etc. and the one thing that really stands out to me is how many people complain about farm work, how hard it is to find it, low pay – the list is endless. Since I’ve completed my 88 days and to be honest, it was an awesome experience and finding a job was super easy for me I decided to write this little guide and hopefully help some of you get a job and extend your visa! 🙂 So let’s get into it!


1. Do your research!

It baffles me how many people just expect to be offered a job. They can’t even put an effort to write a decent post outlining their skills etc. Example post on FB, took me 1min to find:

Screen Shot 2019-08-07 at 4.33.55 pmI understand a lot of backpackers are really young, inexperienced and so on but this is the perfect opportunity to practice your skills, write a good CV/cover letter, show potential employers WHY you are the one for the job. The backpacker market is super competitive & saturated but there is enough jobs for everyone! If you want a good job that pays fair, boss treats you well, you gotta put some effort! There are numbers of websites, forums dedicated to finding eligible work. Spend some time thinking about what kind of job you want, what are your skills and expectations – do you just want 88 days or experience something new? Don’t adapt the negative attitude that farm work is hell – if you think that you are already setting yourself up for a failure.
Take is as an adventure, a new challenge – it’ll be 3 months of your precious time in Australia. Make it a good one!
Here are my fav forums on Facebook (just to name a few) :


2. Write your own advert

I can vouch for this! Whether it’s Facebook, Gumtree or setting a profile on one of the work related websites – there are tons of different ways to reach out to potential employers! I found my job through Facebook and can honestly say this is a way to go in Australia! At least in my opinion 🙂 After my Facebook advert I had 4 job offers within 2 days, my Gumtree ad got me another 3 offers – not bad hey?
Again, put some effort into your advert – think of what can you offer, how can you help your employer, what job would you be good at, do your skills meet your money expectations? This attitude pays off in life – I promise 🙂 Too many people just want easy money with no effort – this approach won’t get you anywhere in life I’m afraid 😉
You can add a picture of yourself – best would be previous, related work, showing that you’re an active, positive person. I’m not 100% sure about selfies/boobs out type of thing; not necessarily shows you in a professional light & may attract wrong type of employers. But that’s just my opinion, whatever works for you guys 🙂
Here’s a great example of well written Facebook ad:
Screen Shot 2019-08-07 at 5.00.26 pm

3. Be proactive

Yes, writing your own ads is great but being proactive is even better! No matter where you are located, printing CVs and going to places in person is always a good idea. We make a first impression within first 30 seconds – so smile, be kind and positive! Aussies are truly awesome people and they really do give anyone a chance if you make a good impression 😉
If you have a car you are already in a better position than most of people – you can drive and look for work anywhere! But those without a car fear not, my pro tip here is to find work for accommodation in desired area and whilst you get free roof over your head in exchange for a couple of hours of work, you can focus on your job hunt in your spare time! Also, staying in one place for longer is awesome as you get to socialise & meet locals and that is a key to success! 🙂 Again, speaking from experience I landed 3 jobs just because I stayed in one place long enough to meet great people, showed that I’m trustworthy & committed and most of all made great memories & lifetime friendships!

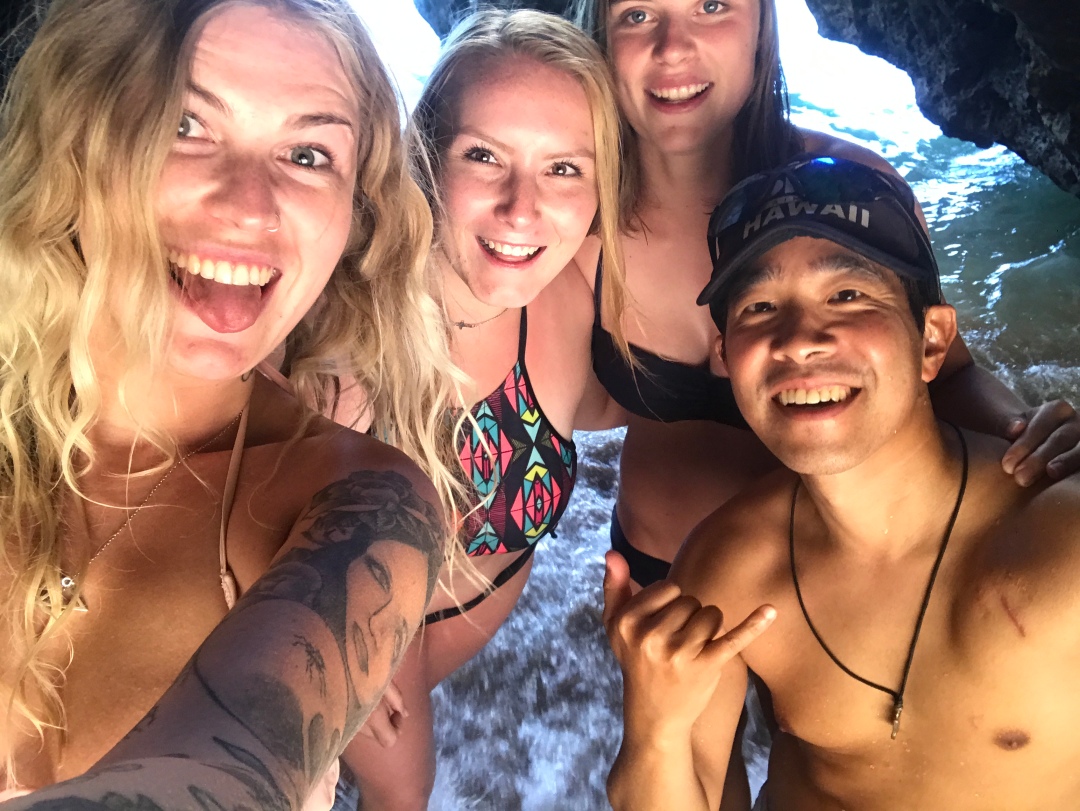
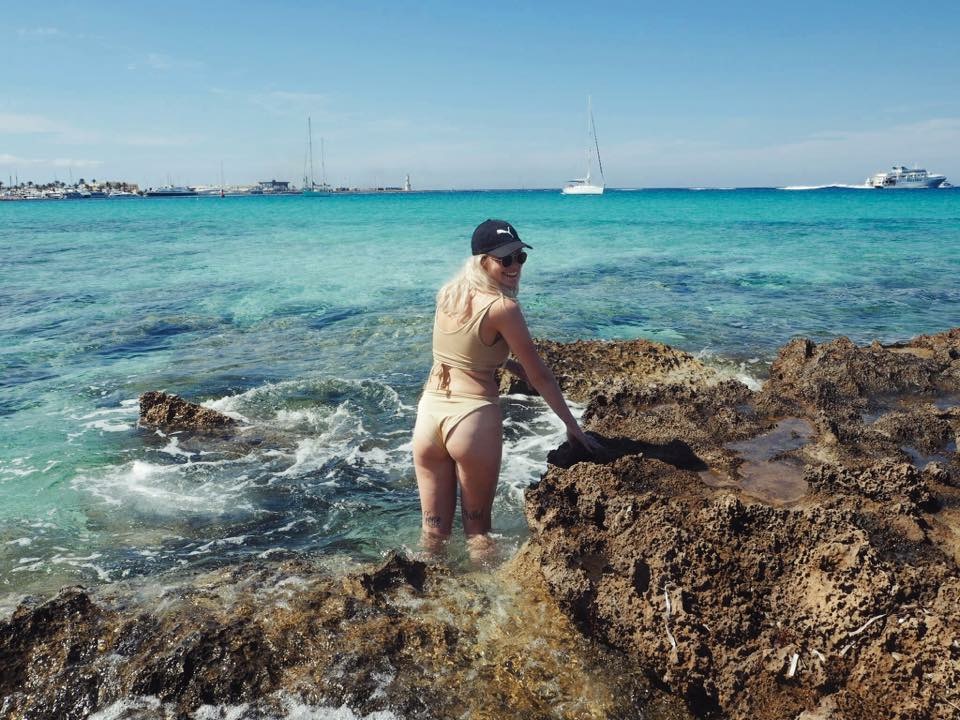
Pic: Agnes Water YHA gang ❤

IMG_5430

4. Trust your gut & know your rights

Once you get the ball rolling, things will become easy and you can start choosing what job is best for you! 🙂 Please always trust your intuition and if something doesn’t feel right IT MOST LIKELY ISN’T RIGHT. If you are unsure about a job offer, the farmer that says weird things, unclear pay rates etc. seek advice from others! Write on a forum, talk to someone you trust – maybe a manager in a hostel, call your mum or your friends who have more experience. Again, do your research – about the pay for certain industries, about overtime and penalty rates and many more. You can check all that on Fairwork’s website. Make sure you get your payslips, your employer pays your Super, 15% tax and that your weekly hours meet industry’s standards so you won’t have any problems extending your visa. Remember, you are here to have a great time, you are protected but also if you managed to make it so far from home, you should be smart enough to take care of your business 🙂


Ok, that’ll be all from me for now! I hope this little guide helps someone. Honestly, finding work isn’t that hard at all if you want it!

                 Finding good job requires more effort – but anything worthy in life does 🙂

So happy job hunting guys, you’ll do great!

Kasia xoxo

My guide to crossing the Nullarbor Plain – stress free

fullsizeoutput_b3

G’day mates it’s been a while! Almost 5 months (to be specific) since I moved to Australia!
A lot of things happened but hey, it’s good – more content for this blog! And to come back with style I decided to share my experience of driving across the Nullarbor Plain. Before me and my travelmates decided to tackle this route, I’ve done lots of research and tbh most of the info I found was over-exaggerated, so I decided to write my own blog post and share all the knowledge I have 🙂 The route we did was WA to SA. Norseman to Ceduna and it was 1200kms +

Excited to hear some cool shit? Let’s go then!

1. Do your calculations first

What do I mean by that is: know how much petrol your car uses per 100kms. Know how many hours you can drive per day. Know where your next petrol station is. Know where you gonna sleep (signal on Nullarbor can be patchy) Simple as that. As 3 of us could drive, we planned to cross the Nullarbor in 2 days – and we done it easily. We had to refill our car twice (only topped up from half tank – prepare petrol on Nullarbor is VERY expensive almost $2 per litre of Unleaded 91 and more for diesel). Also had a 20L jerry can so we saved some $ that way. Petrol stations are approximately 200kms+ apart and there is lots of them so you’ll be absolutely fine. Just do your math first 🙂

2. Have enough food and water + tell people where you going

This should be a no brainer. We overdone it slightly with water – had 10L can each so 30L of water for 2 days – didn’t finish one 🙂 But better be safe than sorry – we met some people on the free campsite that were broken down and shared our stuff with them. Food – take enough of dry/canned food to last 2/3 days. You never know what might happen on the way! You will have to eat all your fresh fruit and veggies before reaching Ceduna, as they have a searching point on the border and all your fresh stuff will be confiscated and you could find yourself in trouble. They do it to prevent bringing fruit flies etc to SA. As I mentioned, the signal can be patchy on the Nullarbor so it’s good to tell people where are you going and how long you estimate to be on the road. But also, you are never alone on this road. It’s actually very busy and we met lots of lovely people!

3. Use CamperMate or WikiCamps to plan your stops/camping

There is LOADS of resting spots and free bush camps so you’ll be absolutely fine. Lot of them have drop toilets, BBQ facilities and are secluded so you can have some quality sleep under the beautiful starry skies. We had good sleep, beautiful dinner and unforgettable experience of camping in the bush in the middle of nowhere. It was the full moon and I just couldn’t get enough of the view, space and silence. AMAZING
You can also camp on the paid campsites or even rent a room in all the Roadhouses and petrol stations – you’re covered.

4. Drive carefully and during the day

This one is very important. There is COUNTLESS roadkill on the Eyre Highway. Most of it is kangaroos, but we’ve seen some wombats and even an eagle 😦 It normally happens when roadtrains or trucks drive at night as all the wildlife becomes active after the sun goes down. So be extra aware when driving in the dark – they literally jump in front of your car as they are attracted by to the light. Or the best advice is don’t drive after dark and you’ll be sweet! Another important thing is aforementioned roadtrains and huge trucks – they go REALLY fast and they can’t slow down or turn easily so be extra vigilant, slow down when you see them approaching and get out of their way. Some people told us to check the wind direction and speed as the strong headwind can really influence your drive and petrol use, also driving in the full sun could be bad for your car. So in general early morning starts, know your stops and petrol stations and beware the big trucks!

5. Have fun! 🙂

Honestly, this drive is nowhere near as bad or dangerous as people make it out to be. If you have your wits about, plan properly, have food, water and petrol you’ll be absolutely fine! Get yourself Spotify premium or lots of good tunes to make the drive fun (you can follow my roadtrip playlist here) Make sure to stop at roadhouses especially the Nullarbor Roadhouse – they are all very unique and interesting and you’ll meet heaps of fun people. Get yourself some cheesy merch such as ‘I crossed the Nullarbor’ car sticker or a tshirt, have a greasy burger and chicken salt chips:) Stop and look at the cliffs, especially The Australian Great Bight – it’s incredible. All this space, desert like, nothingness for hundreds of kilometers – something you can’t describe or capture on the video or pic. You have to experience this yourself. It’s so humbling to realize how huge the world is and we are just tiny creatures being lucky enough to live on this Earth.

Here are some pics if you need any more convincing! 🙂 Happy travels and drop me a comment or message if you have any questions!

fullsizeoutput_b1fullsizeoutput_b3fullsizeoutput_b46lVRBVYGR5eOQ0f+hZlUCAfullsizeoutput_b7fullsizeoutput_b9fullsizeoutput_ba

Wiza Work and Holiday 462 do Australii – jak zdobyć?

Od kiedy zostalam szczesliwa posiadaczka WHV (Work and Holiday Visa), duzo osob pytalo mnie jak ja zdobylam, kiedy aplikowalam, ile to trwalo, co zrobilam z ubezpieczeniem itd. Postanowilam wiec podzielic sie moim doswiadczeniem i wiedza. Szczegolnie ze Lipiec nadchodzi duzymi krokami i nowa pula – 500 wiz – bedzie dostepna od 1 Lipca. Chcialabym pomoc jak najwiekszej liczbie osob otrzymac te wize w sposob latwy i przyjemny tak jak mi sie to udalo:) Musze dodac, ze ja o wize zaaplikowalam w Styczniu tego roku z racji tego ze Polska podpisala nowa umowe z Australia i otrzymalismy 300 dodatkowych wiz. Czyli 500 rocznie whoohoo! Mialam to szczescie ze wizy nie rozeszly sie do tego czasu. No to zaczynamy!

Wymagania aby aplikowac o wize:

  1. Musimy byc pomiedzy 18-30 rokiem zycia,
  2. Nie towarzysza Wam dzieci ktore sa zalezne finansowo od Was
  3. Posiadac wyzsze wyksztalcenie lub ukonczone przynajmniej 2 lata studiow licencjackich
  4. Dowod znajomosci jezyka Angielskiego
  5. Posiadac 5000 AUD (ok 13,000 zl) jako zabezpieczenie na wlasne utrzymanie w przypadku nie podjecia zatrudnienia w Australii oraz bilet powrotny lub srodki na bilet powrotny/wyjazd poza granice Australii (dodatkowe 500+ AUD)
  6. Przebywac poza granicami Australii w momencie skladania aplikacji oraz spelniac wymogi zdrowotne (opisane w aplikacji)

Lista potrzebnych dokumentow:

  1. Wypelniona i wydrukowana aplikacja 1208
  2. Przetlumaczony akt urodzenia/lub oficjalna, kolorowa kopie dowodu osobistego
  3. Przetlumaczony dyplom ukonczenia studiow
  4. Certyfikat znajomosci jezyka (IELTS/TOEFL/CAE itd.)
  5. List od Ministerstwa Rodziny, Pracy i Polityki Spolecznej.
  6. Przetlumaczony wyciag z konta bankowego potwierdzajacy posiadanie wymaganej kwoty 5000 AUD + extra pieniadze na bilet powrotny lub wyjazd z Aus
  7. Oficjalna, kolorowa kopia paszportu (waznego co najmniej 6 miesiecy)
  8. 2 zdjecia paszportowe, podpisane z tylu + data urodzenia

W moim przypadku proces byl bardzo latwy, poniewaz mieszkam w Anglii nie musialam praktycznie nic tlumaczyc (oprocz aktu urodzenia – poniewaz zgubilam moj dowod osobisty;)) Jesli studiowaliscie poza granicami kraju (np. UK/USA/Kanada) w jezyku Angielskim nie musicie przedstawiac certyfikatu jezykowego poniewaz Wasz Angielski dyplom automatycznie jest dowodem znajomosci jezyka. Nie wiem dokladnie jak jest z dyplomami z innych krajow – tutaj trzeba byloby zasiegnac informacji w ambasadzie. Oficjalne kopie zdobylam na poczcie – Royal Mail oferuje serwis potwierdzania autentycznosci dokumentow za oplata £15. Nie wiem dokladnie jak jest w Polsce ale domyslam sie ze podobnie.

Bardzo przydatny jest numer Europe Service Centre +44 (0) 2074203690 (numer do Londynu) Gdzie mozna zasiegnac informacji w jez. Angielskim od 13-16 (BST) od Poniedzialku do Piatku.

WAZNE INFO: od 14 Maja 2018 wszystkie telefony beda kierowane do Australii (co potencjalnie znaczy wiekszy koszt rozmowy) a ESC zostanie zamkniete.

Oplata za wize – 440 AUD (ok 1163 zl) musi byc uiszczona za pomoca karty kredytowej. Karty debetowe generalnie nie sa akceptowane. Aby zaplacic za wize wypelniacie odpowiednia sekcje w aplikacji. Jesli uzywacie czyjas karte kredytowa ta osoba musi podpisac upowaznienie (zalaczone w aplikacji).
Pamietajcie o posiadaniu odpowiedniej kwoty na koncie + dodatkowych pieniadzach na rozne oplaty tzw.handling fees oraz poinforowaniu banku o takiej transakcji (czasami banki blokuja zagraniczne transakcje co moze niestety zawazyc na Waszej wizie).

Kiedy wszystkie dokumenty macie juz skompletowane pakujecie je do koperty i wysylacie kurierem do Berlina. W tym roku 1 Lipiec wypada w Niedziele wiec mozecie dokumenty wyslac w Piatek i upewnic sie ze beda dostarczone w Poniedzialek (nastepny dzien roboczy po Piatku) przed 9 rano. Wtedy macie najwieksze szanse byc w szczesliwej 500 🙂

Adres Australijskiej Ambasady w Berlinie:

Australian Embassy Berlin
Visa Office
Wallstrasse 76-79
D-10179 Berlin,
Germany (Niemcy)

Ogolny koszt: £453 (ok. 2190zl)

  1. Zdjecia paszportowe £6
  2. Oficjalne kopie dokumentow – £15
  3. Tlumaczenie przysiegle aktu urodzenia – £17
  4. Wiza 440 – £240 + fees ok £10
  5. Kurier do Berlina – £25
  6. Ubezpieczenie na rok £140
  7. Stres w oczekiwaniu na informacje – bezcenny 😉

Ja otrzymalam Visa Grant Notification email miesiac po aplikacji. Jeden z najszczesliwych dni w moim zyciu 🙂 Warto jest zapisac sobie ten dokument w telefonie lub wydrukowac – just in case:) Wiza nadawana jest elektronicznie ale ostroznosci nigdy za wiele!
Bilet do Australii zakupiony, ubezpieczenie tez – polecam sprawdzic Alpha Travel Insurance lub Backpacker Travel Insurance a teraz czas na planowanie podrozy! Jesli macie jakies pytania, komentarze do dodania bo moze cos przeoczylam – prosze piszcie i dzielcie sie wrazeniami! Trzymam mocno kciuki za Was i do zobaczenia w Australii!

Venice on a budget

I’ve been sick all week and currently sitting wrapped in blanket, sipping on haldi milk and reminiscing the times when I was in Venice, exploring the endless streets and bridges, eating cicchetti and drinking Aperol spritz. So here it is; my guide to Venice.
Also before I start, shout out to Curtis – my fantastic travel companion, who made my time in Venice even more awesome! 😉

Where to stay

We went to Venice in September for 4 days – really good time of the year as it’s still pleasantly warm around 18 degrees, LESS TOURISTS, prices drop etc. Our flights were £50 return. We rented a sweet AirBnB apartment in Mestre – that is 10min train ride from Venice. I’d say this was a very good decision to stay in Mestre that is significantly cheaper and super close to the island. We’ve paid around £100 each for 3 nights for the whole lovely apartment just for a us – bargain if you ask me 🙂 It was around 5 min walk from the main train/bus station. There’s not much to do/see in Mestre itself, but it was nice to come back to a quiet town after super busy day. Of course if you have more money/want to splash out on a lavish hotel right in Venice by all means: GO FOR IT! Many people said there is nothing quite like getting lost in Venice at night (which we’ve done anyway haha) But for us staying slightly outside the island was great and we enjoyed daily rides to town. IMG_9977

Transport

We’ve purchased a UNICA City Pass that allows you to use all sorts of transport; from bus, train to vaporetti (boat bus) 3 days cost around €30 and you can buy it at the airport. The price included transport from/to the airport. ATVO Bus is super easy to find – just outside Arrivals lounge and you can take any number that includes Mestre (5/25/35/15 if I remember correctly) The journey is around 25-30 mins. In hindsight we didn’t really need it as you can walk EVERYWHERE in Venice. The cool thing was unlimited use of vaporetti – it is expensive without city pass €7 per ride. That way you can see a lot and I just love being on a boat!:) I know that map looks huge and the distances may seem crazy but trust me, you can walk from one end of the island to another in like 40 mins. I think we’ve walked through the whole city in first 2 days haha after that we were just goming back to our favorite bars/cafes and getting drunk on spritz 🙂

Where to eat/drink/hangout

CANAREGGIO is the answer! We absolutely loved the area that is very local, the food (cicchetti is to die for!) drinks and prices are awesome! We met really nice people there and ended up on a fun pub crawl with them 🙂 for example spritz was €2.50 whereas everywhere else it started from €3.50 up to 5 or more! Same with coffee, cicchetti, pizza etc. For some it isn’t as pretty as other neighbourhoods but for me it was super lovely area to visit. In general try to avoid restaurants on the main streets as they are much more expensive and the quality sadly, isn’t great. The park Giardini della Biennale Arte was another great spot – beautiful views, very green, peaceful and far away from tourists. Liberia Acqua Alta is a beautiful bookshop full of very interesting, old books, graphic novels and a great photo spot with famous stairs made of books.


Of course you gotta visit San Marco, Rialto Bridge, Ponte dei Sospiri (Bridge of Sighs) but just going around the city, getting lost and finding charming places yourself is much more fun. My another favorite was Ponte de Chiodo – a bridge without a railing. We went there drunk (obviously haha) and took tons of pictures! The area was super pretty! Also the area where the University is was very vibrant, full of cool bars, cafes and young people.

IMG_9812IMG_9854IMG_9905IMG_9933

I think I spent over £300 over 4 days and tbh it’s a lot for a city break considering we were cautious with money – so yeah Venice is expensive, prepare for that! We didn’t go to any museums, didn’t get gondola or any of the typical tourist stuff because we are rebels like that haha Nevertheless, we’ve had an amazing time and really enjoyed hanging out in this beautiful city. It’s definitely worth a visit. It has this charm and mysterious vibe. Although, it is NOT a city for solo travellers. Haven’t seen many hostels or backpackers. Local people are very private, and tourists are.. well tourists.
I hope you enjoyed and the post was helpful to you 🙂 Here are more pics – enjoy!
                                                  Thank you for reading xoxo

IMG_9805IMG_9818IMG_9844IMG_9852IMG_9885IMG_9894IMG_9923IMG_9974IMG_9989IMG_0003IMG_0011IMG_0019

First time traveling solo – Portugal

This post has been a long time coming, and I have SO MUCH to share with you all!

Back in August I decided to throw myself into deep waters and go on my first trip alone, as well as my staying in a hostel for the first time. The thought of doing this was scaring the shit out of me. I am a total introvert; I love being by myself and avoid company whenever I can. But I booked the flights and accommodation (The Shelter in Lagos – SO AMAZING – but more about this later!), and set out on a solo adventure.

So this trip was me stepping out of my comfort zone BIG TIME. And you know what? It was so worth it! I can’t stress enough how important it is to push yourself to do new things and overcome your fears. It was such an incredible trip! I met the nicest, friendliest and most welcoming people, and quite frankly the only time I was alone was in the bathroom. Portugal was A-MA-ZING. I totally fell in love with the country.

Here’s my little guide for first time solo travelers

  1. If you’re scared of being lonely, let me tell you that if you’re traveling solo you’re NEVER alone – I know it sounds weird. You naturally gravitate towards people and a smile can really help to make some new friends – trust me on this one 🙂 Be open, kind & friendly, spread good vibes and simply do your thing – people will come to you! Bring a bottle of wine and a pack of cards to the common room and let the magic happen! Unless you’re running away from people you will meet plenty of fellow travelers. It’s awesome to travel alone because you can always tag along with someone when you have no plans, but you can also do whatever you want without compromising – because you’re your own boss on this trip!
  2. That’s why choosing the right hostel is essential. Do your research and don’t always base your decision on price – if something doesn’t feel right it probably isn’t. Make sure that hostel offers lockers to store your passport and any other valuables. A free breakfast can be really good when you’re on a budget. Also free towels are helpful when you travel with hand luggage only. Get to know people in your room so you can get an idea about whether you can trust them or leave your stuff in the room. Choose 6 bed female/male only dorm if you don’t feel too comfortable mixing with people too much. I stayed in The Shelter and couldn’t recommend it more – amazing atmosphere, very safe, close to town, quiet, and a great homey vibe – you truly feel like you’re staying with friends. The owners are fabulous and Luca (white retriever) is everything you could ask for!
  3. Do your research about prices and bring more than you think you’ll need. Sticking to a budget is important, especially when you’re not swimming in money like me, but having a good time is equally important. I took £300 for a week and spent every penny – it was totally worth it! Some days you’ll hardly spend anything because you’ll be lounging on the beach drinking all day, and cooking dinner with peeps from the hostel is a great way to save some cash. Other days you’ll go crazy with pizza and sangria followed by an all nighter – and it’s ok!

    To give you an idea about prices in Lagos, Portugal (summer 2017 / backpacker essentials haha)
    Beer – €1/€1.50 in a bar / shops are cheaper
    1l jug of sangria – €9
    Pizza (restaurant in town) – from €6
    Portuguese dinner (fish dish+beer) – €14
    Bottle of wine (shop) – from €3
    Cigarettes – around €4
    Kayaking (2,5hrs) – €30
    Surfing (all day trip) – €50
    Groceries (fruits, hummus, cake, veg) – €8-12
    Transport – €7.20 Faro to Lagos train (2hrs), Taxi to Faro airport €10

  4. Google Maps is your best friend! You can download offline maps and the world is yours 🙂 In Europe we don’t have roaming anymore so you can flood Instagram with your travel pics 24/7 but traveling in other countries may be more difficult without internet – so offline maps are so helpful. Saying that – go out, explore, get lost, ask people for directions and recommendations and simply enjoy!I think that’s it for now – remember be sensible but don’t stress too much. Trust your gut and you’ll be fine! People are lovely in general and the more you travel the more confident you become and can spot danger much quicker.
    And most importantly have an amazing time traveling solo ❤
    Here are some pics from Lagos – ENJOY

IMG_9088IMG_9107IMG_9110IMG_9111IMG_9120IMG_9141IMG_9132IMG_9126IMG_9064IMG_9031IMG_9044IMG_9056IMG_9053IMG_9062IMG_9024IMG_9022IMG_9018IMG_9019IMG_8998IMG_9004IMG_8991

Ibiza

Yesterday I got back from Ibiza and ahhhh I’m really feeling holiday blues! What a beautiful place! I’ve a great time exploring the island with my friend and we only had a budget of £400 that we didn’t even spend! I will make another post about how to have a great time without spending lots of money:)
for now enjoy some beautiful views xx

img_4341img_4349img_4359img_4366img_4372img_4373img_4432img_4436img_4442img_4443img_4446img_4449img_4450img_4494img_4466img_4470img_4474img_4480img_4488img_4493img_4499img_4515p1000299

Jamaica

I recently came back from holidays in Jamaica – Runaway Bay. Magical place… Here’s some pictures but they just don’t do the justice how beautiful Jamaica is ❤

ps. I stayed in Royal Decameron Club and I really recommend it – bungalows are the best!

IMG_8966

IMG_8996 IMG_8999 IMG_9085 IMG_9164 IMG_9165 IMG_9192 IMG_9193 IMG_9222 IMG_9116

IMG_8771 IMG_8806 IMG_8923 IMG_8942 IMG_8950 IMG_9038 IMG_9062 IMG_9102